
A soft photograph becomes easier to troubleshoot when you compare the subject with the rest of the scene. Look for a clearer object at another distance, a trail along an edge, or smearing in something that was standing still. Those clues help you choose between refocusing, increasing depth of field, shortening the exposure and steadying the camera.
They do not always identify one cause. The photographs below show what to look for; the retake checks help you investigate it in your own scene.
Start with the detail you needed
A soft photograph is a problem where it loses detail the picture needs. A blurred background behind a clear face may be exactly right. A blurred eye in that face deserves a closer look.
First view the whole photograph at the size you intend to use it. Then enlarge the important area and compare three places: the intended subject, something nearer or farther away, and a stationary reference such as a wall, tabletop or platform. Keep the viewing scale consistent as you compare exposures.
The useful question is where detail survives. Inspect actual edges and texture, rather than judging the whole frame from a vague impression of softness.
Defocus follows distance; your intended subject decides the remedy
Defocus can leave one distance clear and another soft. Whether you need to move focus or increase depth of field depends on which subjects must be sharp.

Depth-of-field photograph by Alex1ruff, CC BY-SA 4.0. Recorded at f/1.4. Resized and converted to WebP; this version retains that license.

Look at the decorative border around the nearest green d, then follow the stacks into the background. Fine patterns disappear and letter edges spread. There is no strong common trail like the motion examples below.
Now imagine two different jobs for this same photograph. If you wanted only the middle stack clear, the useful focus is in the wrong place: deliberately focus on that stack and compare another exposure. If you needed the front and rear stacks together, the clear range is too shallow. The photograph's creator describes it as a depth-of-field example; these imagined intentions are ours, not evidence that the photographer made a mistake.
That distinction transfers to a portrait. A clearer wall behind a soft face is a reason to check focus placement. Sony's A100 manual, page 14 describes how a background inside the focus frame can be focused when the intended subject is outside it.
When the focus is where you need it but other required distances remain soft, try a smaller aperture—a larger f-number. Canon explains the depth relationship with the other conditions held constant. For people standing in rows, what aperture to use for a group photo works the f-number out from the depth of the group and the width of the frame. Keep the camera position, framing and focus fixed for the comparison. Retain a suitable shutter speed by adjusting ISO or light; otherwise a longer exposure can introduce movement blur while you investigate depth.
Subject motion leaves a trail while fixed detail can survive
Subject movement during an exposure can smear a train while the platform remains much clearer.
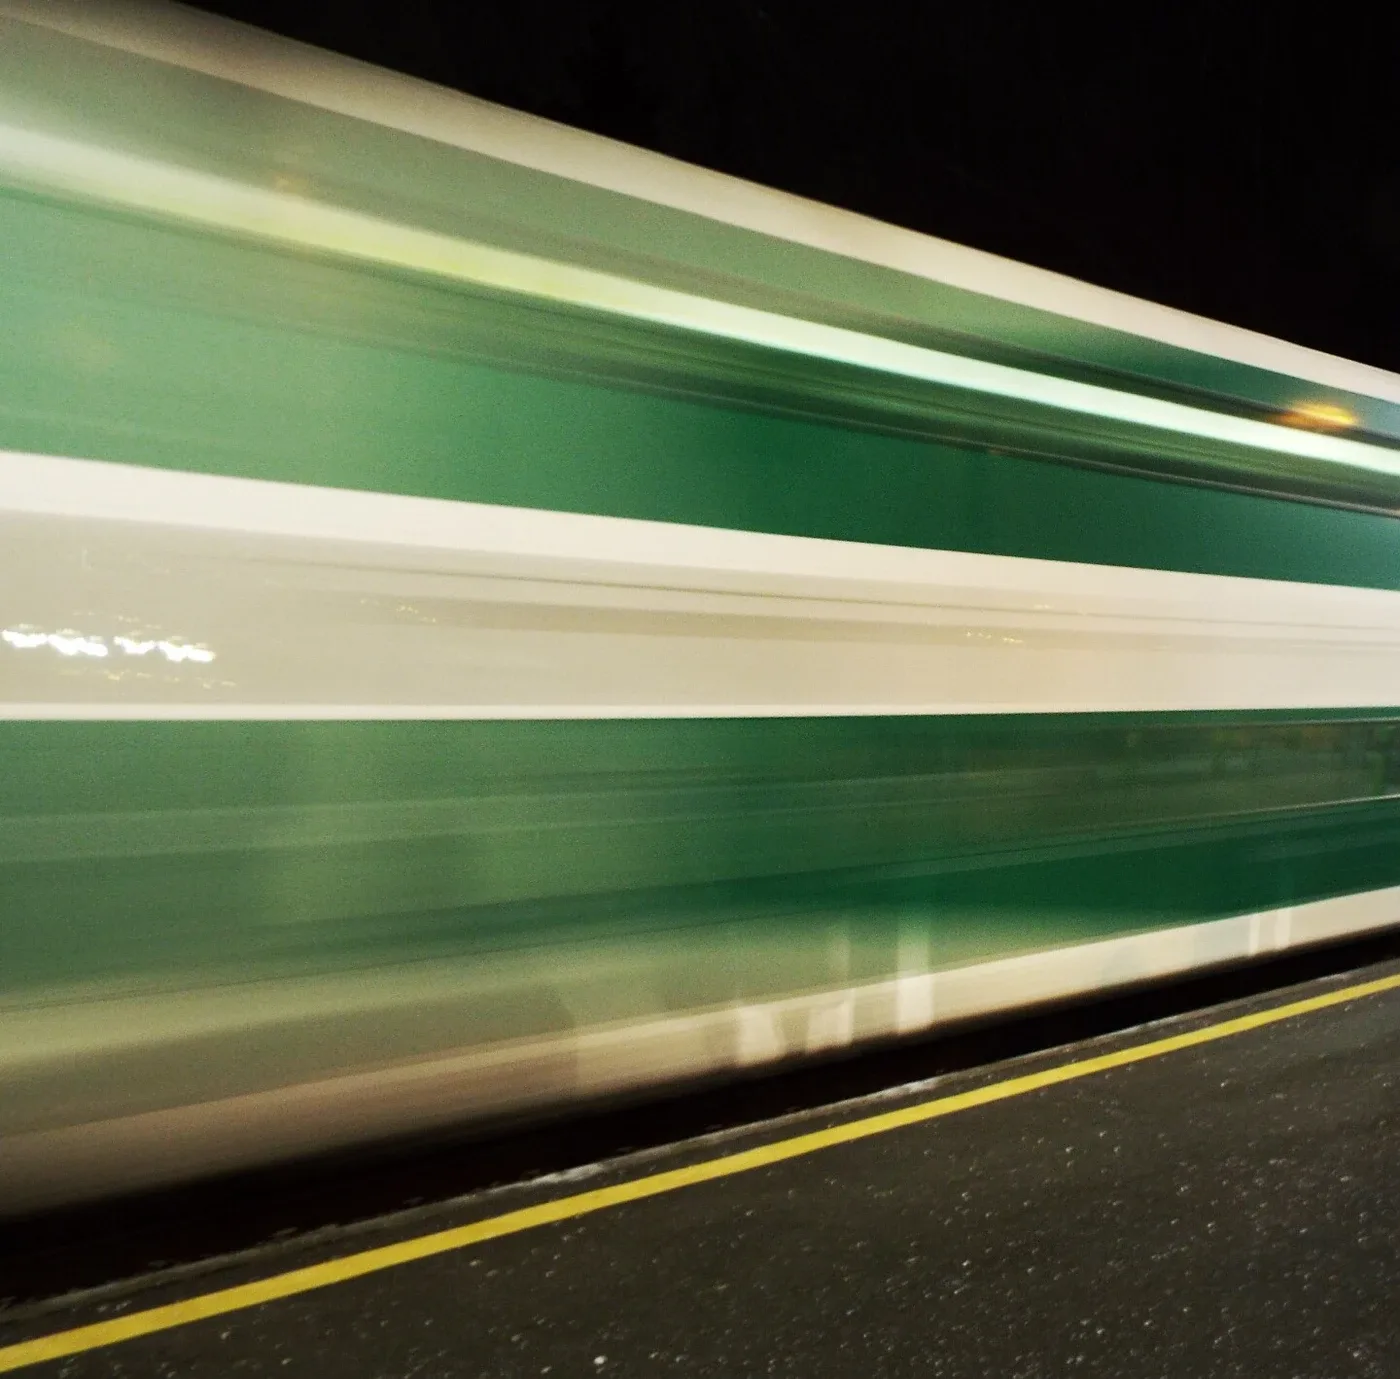
GO Train blur, David Whelan, CC BY 2.0. Recorded exposure: one second. Resized and converted to WebP.

Compare the stretched window detail with the yellow line and small marks on the platform below. The train moved past the platform during the exposure, as the source description records. This gives you both a moving subject and a fixed reference to inspect.
For unwanted subject blur, test a shorter exposure while keeping focus and aperture unchanged; adjust ISO or light as needed. A steady camera alone cannot stop a moving subject from blurring, a distinction made in Sony's guide to camera shake and subject blur. To work out how short the exposure needs to be, our guide to the shutter speed that avoids motion blur starts from how quickly the subject crosses the frame.
A sharp background alone is not enough to diagnose motion: the blocks show how a different distance can also be soft through defocus. Look for the trail as well as the surviving detail, and use a retake when the appearance is ambiguous.
Camera shake also smears stationary references
Camera movement can smear fixed details across a scene, making a tabletop as useful to inspect as the subject.
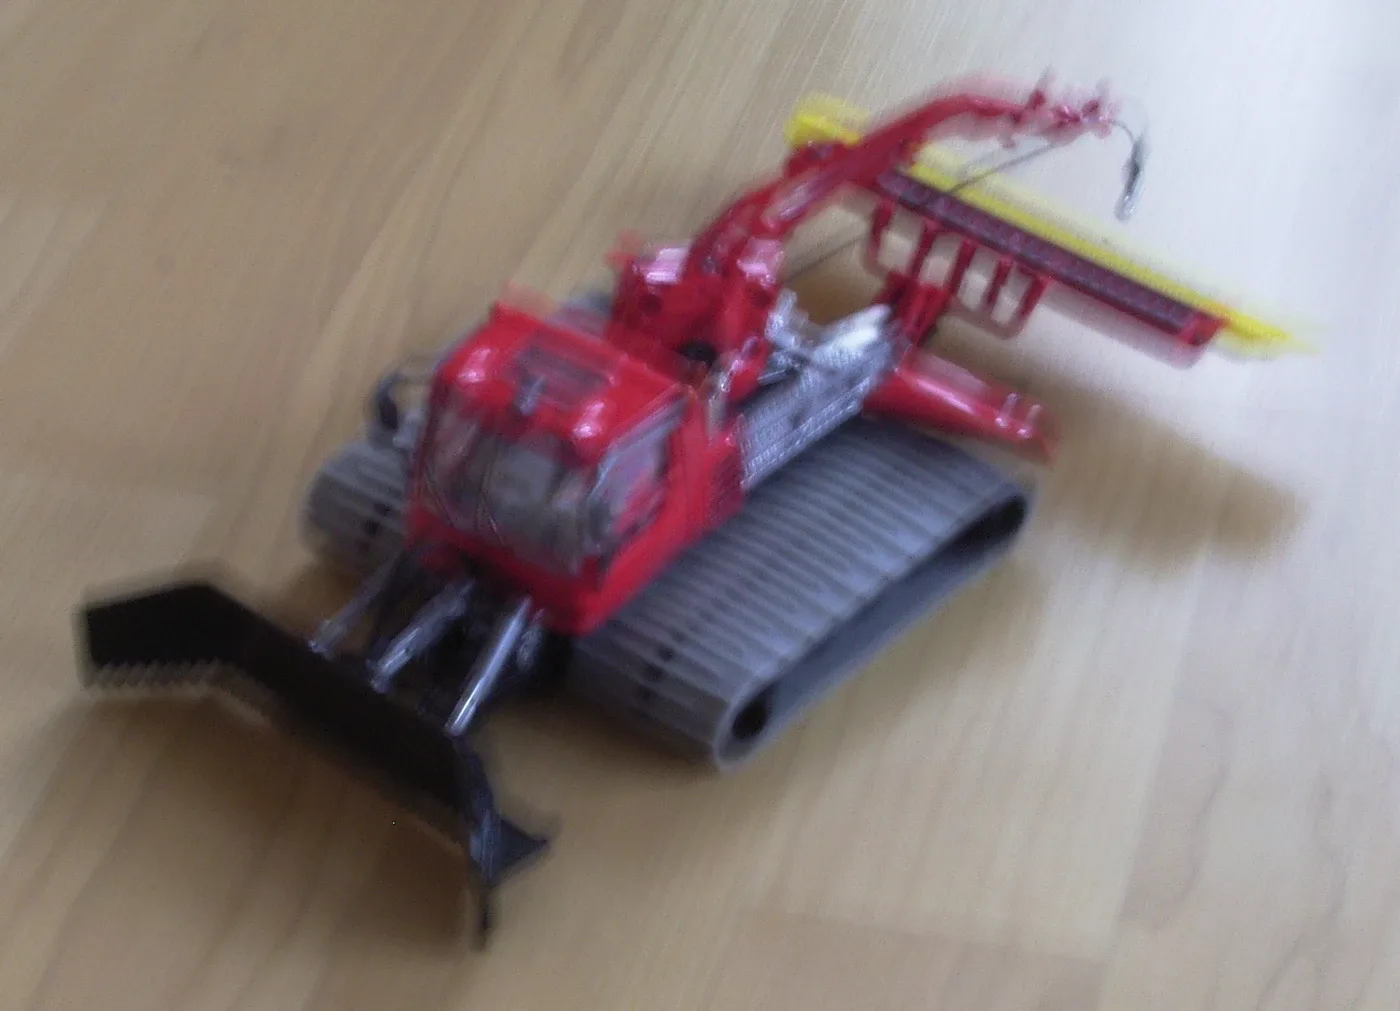
Pistenbully Modell (verwackelt), Stefan-Xp, CC BY-SA 3.0. The photographer identifies camera shake; recorded exposure is half a second. Resized and converted to WebP; this version retains that license.

Look beyond the model's cab to the tabletop grain and yellow rear bar. Several fixed features smear along a similar diagonal. Compare that with the train photograph, where the stationary platform holds much clearer detail than the moving train.
To investigate camera movement in your own photograph, repeat a static scene with firmer support and a careful release, retaining the same focus, aperture and exposure duration. Sony's camera-shake advice recommends a tripod or a stable surface. Repeat the comparison rather than treating one improved frame as a verdict.
An image with nothing sharp does not automatically prove shake. The scene could lie outside the useful focus range, and movement and defocus can coexist. If there is no trustworthy reference, start again with a stationary, detailed subject in good light, deliberate focus and stable support.
Make one change, then compare
A useful diagnostic retake changes the suspected cause while keeping the scene and other settings as consistent as possible. Use these checks against a repeatable baseline:
| What you see | First check | Keep in mind |
|---|---|---|
| Another distance is clearer than the intended subject | Reacquire focus on the exact detail that matters, keeping aperture and shutter speed fixed. | A moving subject may also blur; a clear background cannot settle the cause. |
| The intended distance is clear, but another required distance is soft | Keep focus and framing; use a larger f-number while retaining shutter speed through ISO or light. | This investigates depth, not subject movement. |
| The subject trails while stationary detail remains clearer | Shorten exposure, holding focus and aperture fixed. | A faster shutter can also reduce camera shake. |
| Fixed edges throughout the scene show similar smearing | Add stable support and repeat at the same focus, aperture and exposure duration. | Defocus or mixed faults may still be present. |
If you change focus, aperture and shutter speed together, you may rescue the picture but lose the explanation. When the scene permits, compare separate changes against the baseline. When it does not, prioritize making the important detail clear and accept that the original cause may remain uncertain.
A filter on the lens is one more thing to rule out: repeat the frame without it. Whether it costs anything depends on its quality, the lens and the light, as whether UV filters reduce image quality explains.
How this guide was made
This is a desk-researched guide, developed with AI assistance from manufacturer explanations and licensed photographs by the credited photographers. Afterlight did not capture these examples or conduct controlled retake tests. The source records provide descriptions and exposure metadata; their complete editing histories and focus targets are not available. The examples support qualitative recognition, not measurements of a camera or lens.
The hero uses the same Alex1ruff photograph credited above. All photographs were resized and converted to WebP without adding blur. The Alex1ruff and Stefan-Xp versions remain under their respective ShareAlike licenses. The retake framework is our synthesis of the documented mechanisms: use the visible clue to choose the next experiment, then judge the detail your picture actually needs.
← Back to the journal6 answers