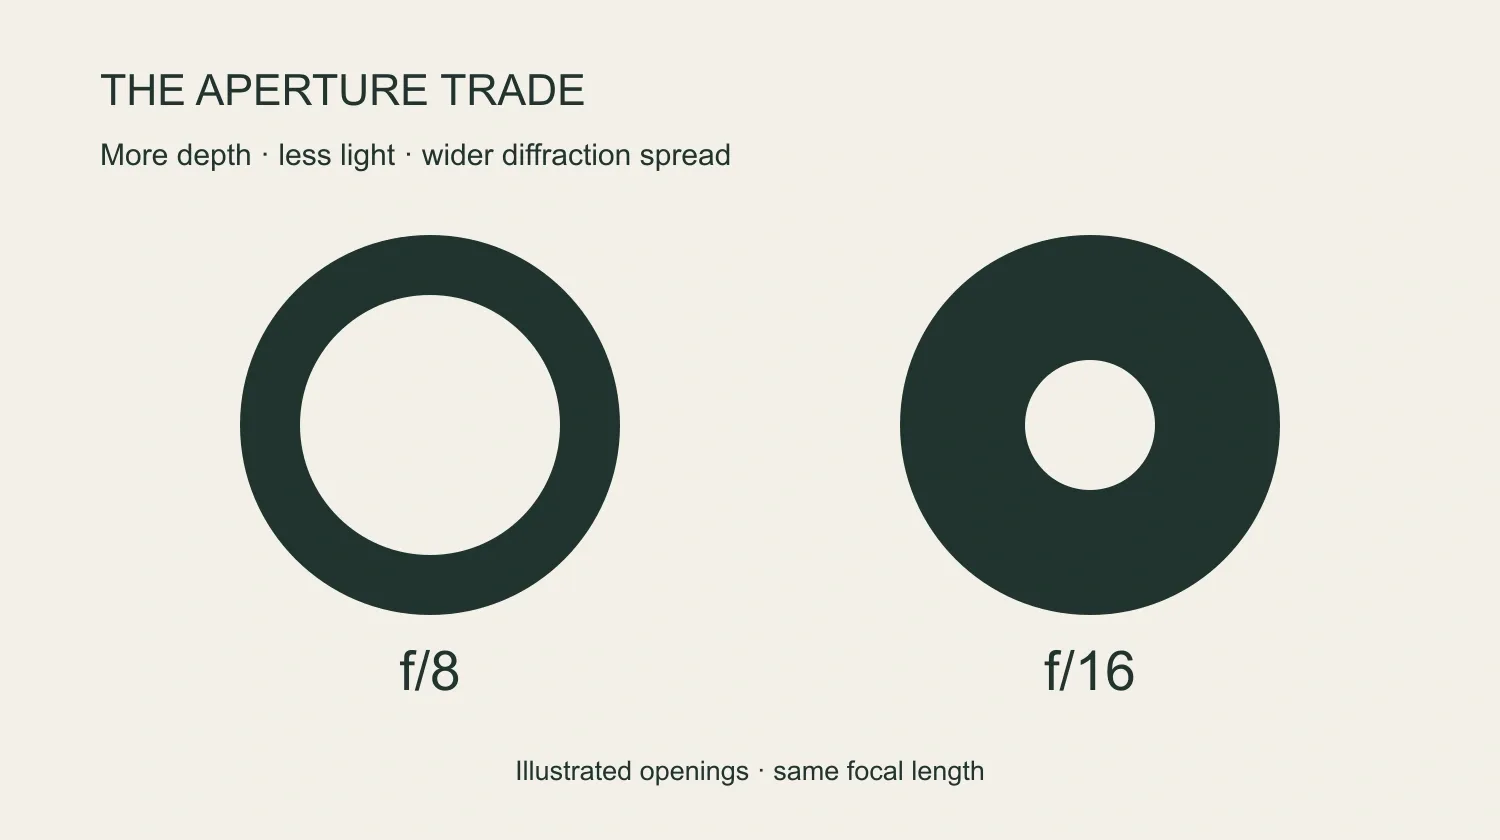
Use f/16 when it preserves important near or far detail that a wider aperture loses, and that improvement survives the exposure trade at your intended output size. Place focus deliberately first. If the extra depth brings no useful gain, there is little reason to pay for it with finer-detail contrast or a slower shutter.
Imagine a photograph with a foreground rock and a distant ridge. An f/8 frame might render the point you focused on beautifully while leaving the rock too soft. At f/16, the finest texture at the focus distance may weaken while the rock becomes more useful. The decision belongs to the photograph as a whole.
First decide which detail needs to survive
The useful aperture depends on the nearest and farthest detail that matter to the photograph. Identify those before asking for maximum depth of field. A soft foreground can be intentional; a rock that anchors the composition may need texture. A distant ridge may need a clear outline without every tree being resolved.
Start with a test frame at f/8 or f/11. If the foreground fails while the background has detail to spare, try focusing nearer. If the background fails while the foreground is comfortably sharp, try farther away. Recheck both ends after each adjustment. When one subject has priority, protect that subject rather than forcing equal sharpness everywhere. A group photo is the same decision with faces in rows; what aperture to use for a group photo turns the depth of the rows into an f-number.
Depth of field is a range of acceptable blur, not a slab in which every distance is equally sharp. ZEISS's depth-of-field paper explains why sharpness changes continuously with distance. A focus adjustment can therefore make a wider aperture sufficient; stopping down cannot decide which detail deserves priority.
Why stopping down can help and hurt at once
Stopping down to f/16 reduces geometric defocus but increases diffraction. These effects act together in the photograph, though they arise differently.
An object away from the focus distance would form its sharp image slightly in front of or behind the sensor. A narrower opening makes the light cone narrower, so its intersection with the sensor spreads over a smaller area. That is the geometric reason stopping down helps detail away from best focus. Edmund Optics illustrates this relationship.
Light also spreads through diffraction, even with focus perfectly placed. As the aperture gets smaller, this spreading increases and fine details lose contrast. Diffraction exists at every finite aperture; f/16 is not a sudden failure threshold. The Airy-disk relationship describes the ideal optical limit, not the complete performance of your lens and camera.
That is why a crop taken only from the best-focused part of the frame cannot settle a depth-of-field decision. It shows a cost, while missing the place where you hoped to gain something.
A close foreground changes the bargain
Removing an unnecessarily close foreground can reduce the need to stop down. Consider two calculated scenes using the same ideal 24 mm lens and a very distant background:
- Scene A: important foreground at 1 metre; focus at 2 metres.
- Scene B: important foreground begins at 2 metres; focus at 4 metres.
These focus positions balance near and distant geometric defocus in this particular model. They are not a general instruction to focus at twice the nearest distance: a finite background or a more important subject changes the problem.
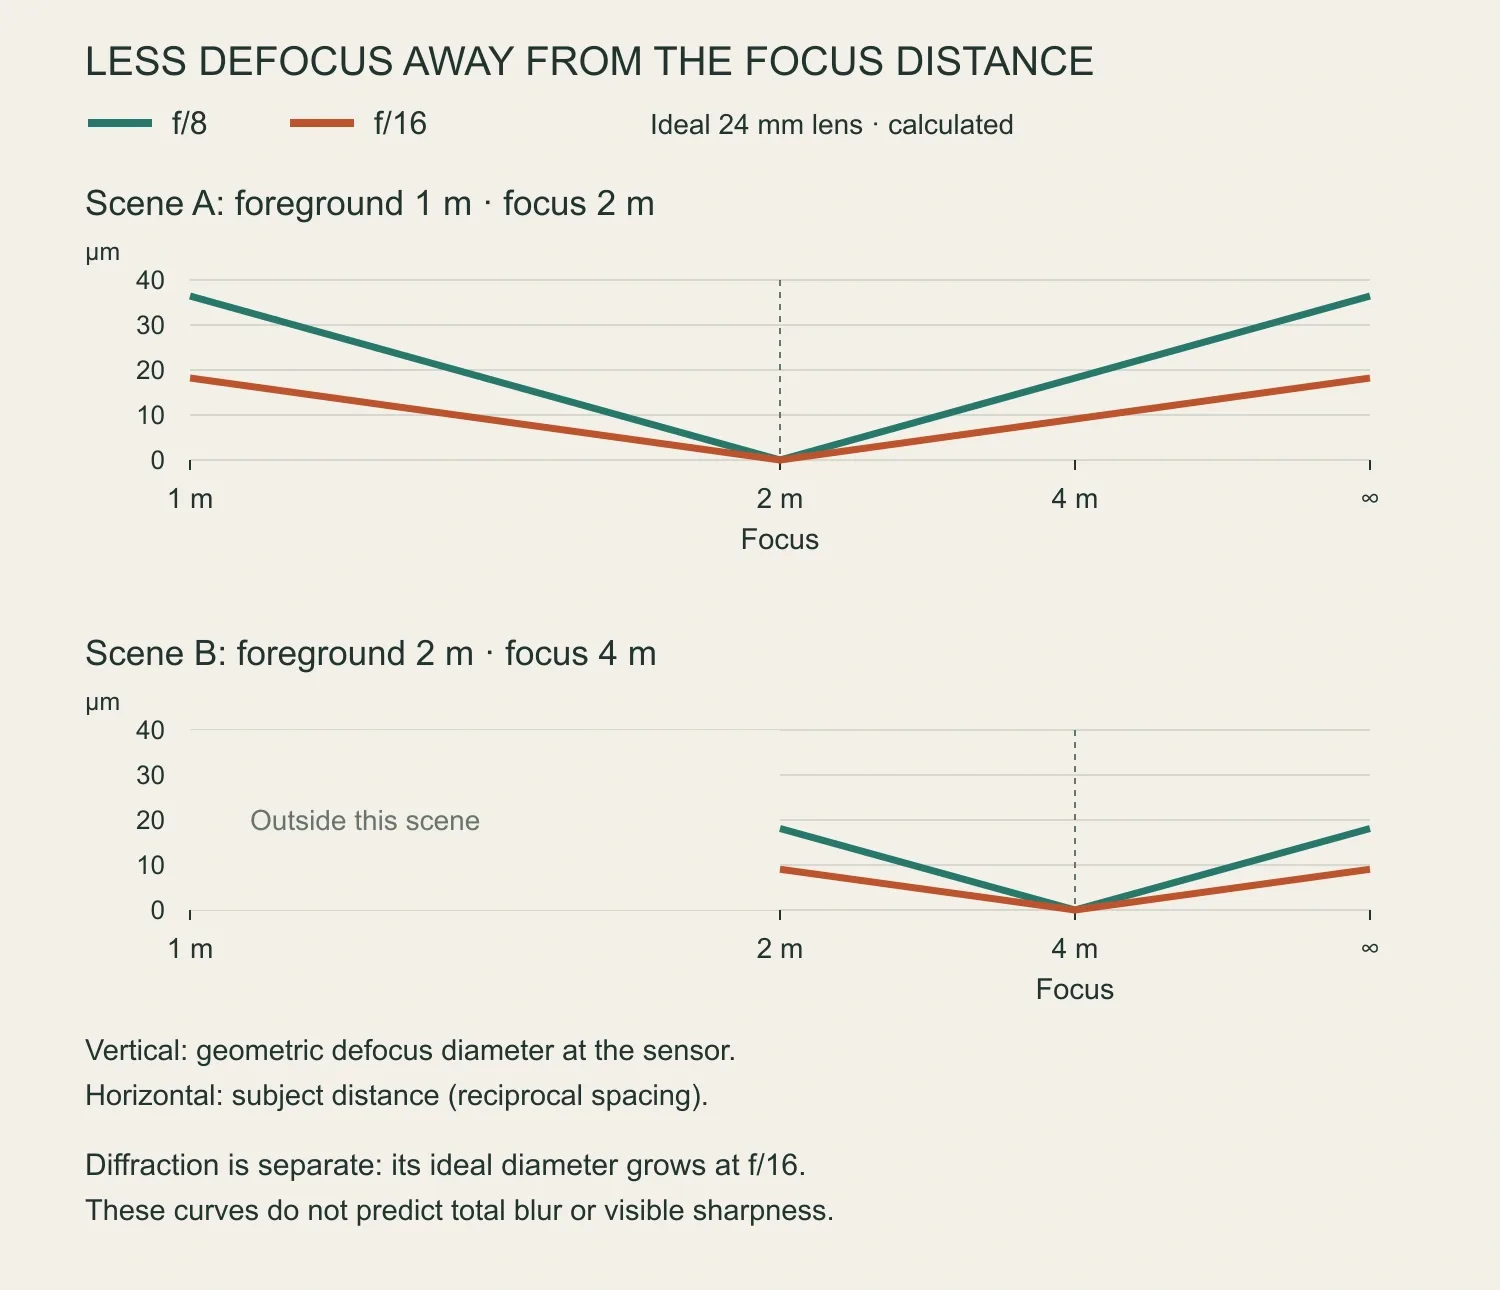
Calculated relationship, not sample photographs. Both panels use the same scales; the distance axis uses reciprocal spacing to include infinity. Curves show geometric defocus only. Zero on a curve means no geometric focus error, not perfect real-world sharpness.
The vertical measure is the diameter of the defocused image of a point at the sensor, in micrometres—thousandths of a millimetre. Smaller means less geometric defocus. In Scene A, stopping from f/8 to f/16 cuts endpoint defocus from 36.4 to 18.2 micrometres. In Scene B, f/8 already gives 18.1 micrometres, almost the same endpoint result as Scene A at f/16.
The practical lesson is to reconsider a foreground that adds depth demands without adding much to the picture. Excluding it and refocusing may let you keep a wider aperture. The calculation does not say the two compositions look equally sharp or equally good.
Diffraction moves in the opposite direction: the ideal Airy-disk diameter at our reference wavelength doubles from about 10.7 micrometres at f/8 to 21.5 at f/16. Do not add those numbers to the plotted defocus values or use them as a sharpness score; the two diameters describe different things. The model explains why there is a trade. Your actual frames reveal whether it is worthwhile.
Keep the shutter speed the subject needs
The extra depth at f/16 is useful only if the exposure still preserves the detail you care about. Moving from f/8 to f/16 costs two stops: at fixed ISO, a shutter speed of 1/125 second becomes approximately 1/30 second for the same exposure.
A tripod can help a still rock survive the longer exposure. It cannot keep grass, leaves or people still. If 1/125 second is needed for the subject, keeping that shutter speed would instead require a nominal increase from ISO 100 to ISO 400 for similar brightness. That restores brightness, not the light lost through the smaller opening. Compare the resulting files rather than assuming either trade is free.
For a stable subject, focus stacking offers another route: make several frames focused at different distances and combine their sharp regions. Nikon's focus-stacking guidance describes the process and cautions about movement. A windblown foreground makes a single well-chosen exposure more attractive, even if some depths remain softer.
Make the aperture comparison at delivery size
Compare apertures at the same finished size and crop, using the near and far details you selected. A large enlargement or heavy crop magnifies blur that may be inconsequential in a small image. This is also why the same marked aperture does not mean the same output-level trade across formats; our sensor-size guide explains that relationship.
For a scene you can repeat:
- Set the composition and focus. Identify a near detail, a detail at the focus distance and a far detail. Make the focus adjustment described above before the aperture series.
- Capture f/8, f/11 and f/16. Keep the camera position, focus and lighting as consistent as possible. Compensate exposure for similar brightness. For a static scene, a stable camera and fixed ISO help isolate the aperture change; for moving subjects, keep the required shutter speed and include the ISO cost in the comparison.
- Check what changed. Inspect all three depths with matching processing. Look for useful detail recovered at the ends, texture lost around the focus distance, and motion introduced by the shutter. If one end still fails while the other has spare detail, try a revised focus position before closing the aperture further.
- Judge the intended result. Resize to the planned screen dimensions, or compare prints at the planned size and normal viewing distance. Magnified crops help explain differences; they need not decide which photograph works.
Keep f/16 if it rescues important depth and the finished image tolerates its costs. If f/11 already meets the requirement, use f/11. If none of the frames does, change the depth requirement, wait for less movement or consider stacking a stable scene.
Before settling on f/16, point to the detail it saves. If that gain disappears at delivery size—or the subject moves through the longer exposure—the wider aperture has earned its place.
How this guide was made
Afterlight used AI assistance for research, writing, calculations and original diagram construction. This is an explanation of optical principles and a proposed comparison procedure, not a hands-on lens test. No real-camera comparison photographs were supplied.
The diagram uses an ideal thin 24 mm lens, ordinary subject distances and an infinity background. Its defocus values follow the thin-lens equation; the separate diffraction figures assume a circular pupil and 550 nm light. With all distances in millimetres, geometric defocus diameter is 24² × |s/u − 1| / [N × (s − 24)], where s is focus distance, u is subject distance and N is f-number. At infinity, the absolute-value term becomes 1. Lens aberrations, sensor sampling, processing and movement are not modeled. Macro photography needs a different treatment.